From Brass Mesh to Micro-Laminar Honeycombs: Why Modern Tap Maintenance Changed
Physical Vapor Deposition (PVD) zirconium or titanium nitride coatings measure somewhere around 0.25 to 0.5 microns in thickness. One slip with hardened steel pliers exposes the underlying brass substrate immediately. In high-grade stainless steel spouts, aggressive steel teeth scrape away the self-healing chromium oxide passivation layer, inviting localized surface rust and permanent visual scarring. Modern Scandinavian kitchen architecture relies on these ultra-thin metallic vapor layers, alongside matte black powder coats and unlacquered brushed brass, to achieve crisp geometric profiles without heavy casting bulk.
Inside the spout tip, fluid engineering underwent a parallel shift. Engineered polyoxymethylene (POM) honeycomb matrices replaced multi-layer brass wire screens across European production lines during the late twentieth century to resist bacterial biofilm attachment and lime adhesion. Where mid-century wire meshes could be scraped out with a pocketknife and wrenched back onto heavy chrome-plated spouts with pipe wrenches, modern micro-laminar cartridges require delicate extraction and chemical precision.
Maintenance protocols for architectural fixtures favor non-marring polymer contact to avoid the micro-scratches that standard plumbing wrench teeth can leave on Nordic brass and matte black spouts. The step-by-step restoration protocols detailed below apply exclusively to residential mains-pressure kitchen mixers operating between 1 and 5 bar, leaving out commercial pre-rinse spring units and low-pressure gravity-fed systems.
Reading the Stream: Differentiating Aerator Blockage from Cartridge Failure
Before touching a tool to a finished spout, observe the water column for close to ten seconds. A kitchen mixer exhibits distinct hydraulic signatures depending on whether the obstruction sits at the exit nozzle or deep within the valve body. Lateral needle sprays deflecting at angles greater than 15 degrees from the vertical axis indicate localized calcium carbonate bridging across the outermost nearly 1.2 mm honeycomb apertures. Conversely, a sluggish, pulsing drip that lacks acoustic aeration points to upstream particulate matter—typically rust flakes, silica sand, or solder beads, trapped directly above the internal flow restrictor.
Pull-out dual-spray kitchen heads introduce an intermediate failure point between the main lever cartridge and the spout tip. These heads pair a central aerated stream with a perimeter ring of flexible elastomeric spray nozzles. If the perimeter spray jets fire erratically, pinching and rolling the silicone tips with your thumb while the water runs will dislodge brittle scale crusts. However, if the head refuses to switch cleanly between stream and spray modes, the fault lies deeper. On pull-out dual-spray heads, depressing the toggle while flow is pressurized above 3 bar tests whether the internal spring-loaded diverter shuttle is sticking due to particulate scoring.
- Erratic lateral misting: Mineral crystallization on the bottom face of the POM exit honeycomb; requires chemical descaling of the plastic core.
- Uniformly weak, silent stream: Sediment accumulation flattening the water path across the upstream stainless steel dome screen; requires mechanical reverse-flushing.
- Incomplete spray-to-stream switching: Mineral scaling or grit scoring inside the pull-out wand's spring-loaded diverter shuttle; requires wand soaking or cartridge replacement.
- Stiff handle actuation with reduced volume: Ceramic disc scoring or supply line constriction; aerator servicing will not resolve the drop in pressure.
Selecting Removal Keys and Jaw Protectors for Exposed and Recessed Housings
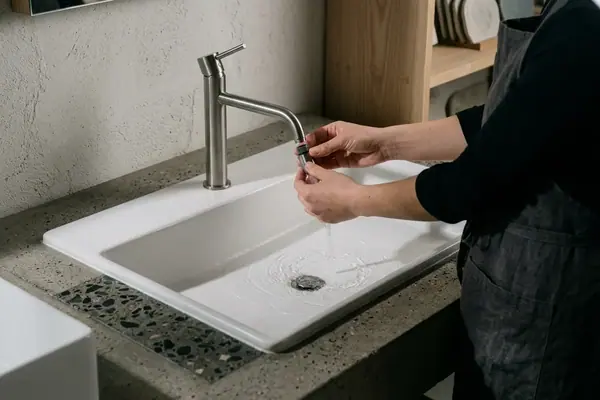
Architectural tap spouts terminate in one of two mechanical configurations: an external metallic sleeve that threads onto the spout tip, or a headless recessed cache aerator that threads directly inside the spout barrel. Applying the wrong extraction method ruins either the decorative plating or the fine internal polymer castellations. Furthermore, factory warranty coverage on architectural fixtures typically excludes tool-mark damage, turning a five-minute maintenance task into an expensive spout replacement.

External housings with twin wrench flats typically require a 22 mm smooth-jaw spanner or a rubber strap wrench rated for at least 15 Nm of rotational shear without slipping. When mineral creep binds the brass threads together, standard workshop habits fail quickly. Serrated pliers can bite through masking tape wrapped around the spout; vegetable-tanned leather offcuts in the neighborhood of 2.5 mm thick and smooth-jaw parallel pliers provide a more substantial barrier. Thick vulcanized silicone repair tape wrapped in three overlapping layers also provides a reliable mechanical barrier under parallel jaws.
Recessed cache aerators eliminate the external metal ring entirely so the spout tube maintains an unbroken cylindrical silhouette. Because no wrench flats exist, you must insert a toothed extraction key upward into the spout tip. Recessed cache aerators require color-coded injection-molded acetal (Delrin) or ABS keys matched to standard metric thread pitch diameters: M16.5 (blue), M18.5 (red), M21.5 (yellow), and M24 (green). Acetal resin tools possess a lower surface hardness than electroplated nickel, PVD zirconium, or the chromium oxide film on brushed stainless steel, preventing both mechanical micro-abrasions and galvanic metal transfer during high-torque unthreading.
Chromium Oxide Preservation Rule: Never substitute needle-nose pliers or flathead screwdrivers for a missing acetal cache key. Hardened steel tips shear off the POM castellation teeth instantly and gouge the internal spout wall, breaching the corrosion barrier at the exact wet-dry interface where mineral salts concentrate.
Controlled Descaling: Dissolving Limescale Without Stripping Protective Coatings
Once the assembly spins free from the spout, resist the urge to drop the entire unit into a cup of harsh household descaler. You must break down the aerator assembly into its four distinct service zones: the decorative PVD/electroplated outer brass sleeve (acid-intolerant, dry-wipe only), the POM honeycomb and flow regulator core (citric acid safe up to 40°C), the domed stainless steel upstream sediment screen (mechanical reverse-flush), and the top EPDM compression washer (discard if flattened below 1.2 mm).
Step-by-Step Capsule Disassembly and Chemical Treatment
- Strip the top seal and screen: Lift the black elastomeric washer off the top rim of the housing, then gently pry out the domed stainless steel sediment screen sitting immediately beneath it. Hold the metal screen upside down under a running tap to reverse-flush loose sand and pipe scale out of the weave.
- Eject the polymer core: Push upward from the bottom exit face with your thumb to pop the inner POM cartridge out of the decorative metal sleeve. If calcium bridging has cemented the plastic core to the brass wall, tap the rim evenly with the handle of a plastic screwdriver until the bond shears.
- Isolate the decorative sleeve: Set the outer brass or stainless sleeve aside on a dry cloth. Wipe its interior threads with a damp microfiber rag, keeping it completely away from acidic solutions.
- Mix the organic acid bath: Submerging the extracted POM plastic core in a 4% to 6% food-grade citric acid solution warmed to 40°C dissolves crystalline calcium carbonate deposits within 45 to 90 minutes. Standard diluted white household vinegar works similarly, as mild organic acids break the ionic bonds of calcium carbonate without attacking the polyoxymethylene polymer chains.
- Brush the micro-channels: Remove the POM core from the warm bath and brush both faces with a soft nylon bristle toothbrush to clear softened scale paste from the mixing chamber and honeycomb apertures, then rinse under cold water.
Industrial bathroom cleaners have no place in this process. Polymer and metallurgical degradation tables confirm: hydrochloric or sulfamic acid bath concentrations exceeding 2% will leach zinc from raw brass threads (dezincification) and permanently spot living unlacquered brass within 3 to 5 minutes of immersion. Even on stainless fixtures, aggressive mineral acids destabilize the passive chromium oxide layer, leaving dark gray etching marks that cannot be polished out without altering the brushed grain.

Evaluating Elastomer Compression and Torque Limits During Reinstallation
Reassembling a descaled aerator with a fatigued rubber gasket guarantees an annoying drip that tracks around the outside of the thread line and deposits fresh scale rings on the spout exterior. Municipal water suppliers increasingly treat distribution lines with chloramines, which break down synthetic rubbers over time, causing the material to swell, lose rebound elasticity, or shed microscopic black particles.
Inspect the top sealing ring under bright light before reassembly. An EPDM or nitrile top gasket that has compressed below 1.2 mm in thickness or exhibits radial micro-fissures from chloramine exposure must be replaced before rethreading. When seating the components back into the outer sleeve, drop the clean POM core in first until its shoulder rests flush against the bottom lip, place the stainless steel sediment screen on top with the convex dome pointing upward into the oncoming water stream, and lay the fresh EPDM washer flat across the upper rim.
Over-tightening is the primary cause of split spout tips and crushed flow regulators. Threading the housing until the elastomer contacts the spout seat, followed by a maximum mechanical rotation of 45 to 90 degrees (1.5 to 2 Nm of torque), seals the waterway without extruding the rubber ring into the flow path. This controlled seating pressure preserves the internal geometry required to meet EPA WaterSense guidelines on residential faucet flow efficiency, ensuring the regulator maintains a crisp, splash-free column rather than a throttled spray.
When to Stop Dismantling: Recognizing Valve Seat Erosion and Supply Line Debris
Before threading the restored aerator capsule back into the spout, hold a deep vessel under the tap and open the mixer handle fully for five seconds. This unthreaded purge flushes out any loose pipe scale disturbed during extraction and verifies the health of the upstream plumbing. An unrestricted open-spout flush (aerator removed) on a healthy residential line should deliver between 8 and 12 liters per minute at 3 bar without sputtering or pressure drop.
If the open-spout stream coughs, trickles, or exhibits severe pressure loss on either the hot or cold side, the restriction lies upstream inside the ceramic disc cartridge, the braided flexible supply tails, or the under-sink angle stops. Stop your tool intervention at the spout tip. Attempting to extract seized ceramic cartridges from integrated Scandinavian mixer bodies without isolating the mains and using a dedicated 27 mm to 32 mm thin-wall deep socket frequently warps the thin outer brass housing, rendering the entire tap unserviceable.
Instead, examine the debris you rinsed off the upstream side of the domed stainless steel sediment screen during disassembly, as the material trapped there diagnoses the exact upstream failure. Black flecking trapped on the upstream side of the domed stainless steel sediment screen indicates EPDM inner-liner delamination inside braided flexible supply hoses typically aged 8 to 12 years. Look closely at the residue sitting on your cloth right now: are you looking at pale, chalky mineral grains that dissolved fizzing in your citric acid bath, or are those soft, smearable black rubber flakes warning you that an aging under-sink supply hose is disintegrating from the inside out?